Archive for Project Tips & Tricks

Times-Saving Science Fair Project Tips

A question we get a lot around here goes something like this: “My kid needs a project, but we’ve got soccer, gymnastics, homework, and chores every day… we need a good science fair project and QUICK!”

Unfortunately, I don’t have an easy answer for this.  Most folks are still trying to cram a week’s worth of activities into a mere 24-hours, and then wonder why they have trouble coming up with great science project ideas.  It’s a miracle if dinner’s even on the table on soccer night.

redbeaker

Science fair projects can feel this way a lot.  They are usually something added ON TOP OF all the other stuff you have to do – homework from math, extra credit assignments from spelling, extra books to read and report on… and the last thing you need right now is yet another project, only this one is going to be judged.

So how can you survive this stressful science season and still enjoy the process? Well, I generally don’t think as well under pressure as I do when I am free to be creative and enjoy the process.  And one of the most powerful ways to generating great content (and projects) is total immersion.  Here’s what you can do to really make the process enjoyable and educational:

  1. Slow down. Schedule time in your week where you can sit with your project for at least a couple of uninterrupted hours.  To get your creative juices flowing and allow for side-tangents, this is the minimum amount of time you’ll need to get the most out of your efforts. This means no phone calls, internet surfing, computer games, or iPODs.  Your mind is totally free to focus entirely on the task at hand.
  2. Banish perfection. Take the stress out of trying to find the perfect project and focus rather on what you find interesting.  Bugs or brain cells? Rockets or robotics? Lasers or llamas?  Once you have a ballpark idea on what you want to learn more about, then you can start gathering your information.
  3. Start a journal. Even if your kid’s not a writer, it’s important to start logging what you’re finding interesting so you can go back and research more if needed (it’s also a great start to your report’s bibliography).    For non-writing kids, use a video camera to capture the sparkle in their eyes as they delve into their project.  Use still photos to paste into your journal as you go.
  4. Get help. Start tapping into resources you already have around you.  You don’t  need to re-invent the wheel, but you do need to make significant progress on your project.  Success always leaves clues, so look for kids that won last year and find out what exactly they did to make it to the top (if that’s your goal).  Chances are it had little to do with the official “topic” of study but rather the way they went about it. Find other local clubs in the area that would be helpful to you, from local astronomical clubs to airplane pilots to the tech at the pharmacy… they can all help steer you in the right direction.

So there you have it – time saving tips for your science fair project season.  While initially these tips may seem to take more time than they save,  you’ll find that the focus and clarity you get in return will be worth tenfold.

Happy Experimenting!

Comments off

Science Fair Tips

Hi there! It’s been a few months since my last post, so I wanted to be sure to get you great information now that I’m back in the swing of things!  One of the best ways you can encourage your child to do their own work is to provide them with the right tools and information that are interesting to them.  So if your kid is nuts about lasers and light but couldn’t care less about plants (and you’re a botanist!), doing a science fair project about photosynthesis probably isn’t going to work out so well.

However, if you toss a handful of spinach leaves in the blender along with a bit of water and whirl away… and then hit the plant juice with a UV (black) light, you’ll find that it glows red. Not only is this a great start to a science fair project, it will also kick-start their brain in a way that engages them in the project and leaves you on the sidelines as ‘coach’ (which is where you want to be anyway – this is THEIR work, not yours!)

There are tons of great ideas on this website about how to do interesting science just by using regular household materials (did you find the picture of the laser light show build inside tupperware on this site yet?)  And we’re here to help you through it. One of the things you want to do before you leave this site is download the ‘Free Stuff’ and see what you can find inside.

For older kids, the Free Guide isn’t going to be enough – you’ll actually need to check out our science fair project kits, especially the Linear Accelerator and the R.O.V. project.  The physics and math modeling behind the Linear Accelerator is enough to make a college student cry, so don’t go overboard on the the mathematics.  Just have fun and enjoy the process.

I’ll write more cool ideas soon, including how to make a homemade telescope and microscope.  Happy experimenting!

~Aurora

Comments off

Measuring the speed of light… the HARD way.

Okay, so if you’re a nut about physics, this is one I can sketch out fo you, but you’ll need to fill in the gaps on your own.  If you want an easier method, check out this post here.

You can recreate Galileo’s mountain-top experiment by arming yourself and a friend with identical digital watches and flashlights.  At a specified time, one of you flashes the light, and the other records the time when the flash is seen. The trouble with this is at unless you’re on different planets, you’re going to have a hard time seeing a less-than-instantaneous result.

You can modify this experiment so that you set up a mirror (instead of a friend) far away, and bounce a beam of light off the mirror and record the mound of time it takes for the light to travel the set distance.  And instead of using your eyeball to record “when” the flash of light returns, you can use a strip of film on a spinning wheel. A further step is to split the initial beam in two, and have one beam take a longer path to return home, and record the time difference on film (which you can back-calculate to get the time difference).

The first successful speed of light measurements were made by a Danish astronomer using an eclipse of Jupiter and Io.

Comments off

Making indoor rain clouds…

Chemistry Experiment: Indoor Rain Clouds Making indoor rain clouds demonstrates the idea of temperature, the measure of how hot or cold something is. Take two clear glasses that fit snugly together when stacked. (Cylindrical glasses with straight sides work well.) Fill one glass half-full with ice water and the other half-full with very hot water (definitely an adult job – and take care not to shatter the glass with the hot water!). Be sure to leave enough air space for the clouds to form in the hot glass. Place the cold glass directly on top of the hot glass and wait several minutes. If the seal holds between the glasses, a rain cloud will form just below the bottom of the cold glass, and it actually rains inside the glass! (You can use a damp towel around the rim to help make a better seal if needed.)

You can turn this into a science fair project by testing the effects of water temperature… what is the ideal water temperature to really ‘make it rain’?

Comments (1)

Microwaving Soap

When you warm up leftovers, have you ever wondered why the microwave heats the food and not the plate? (Well, some plates, anyway.) It has to do with the way microwaves work.

Microwaves use dielectric heating (or high frequency heating) to heat your food. Basically, the microwave oven shoots light beams that are tuned to excite the water molecule. Foods that contain water will step up a notch in energy levels as heat. (The microwave radiation can also excite other polarized molecules in addition to the water molecule, which is why some plates also get hot.)

The following experiment is a quick example of this principle using a naked bar of Ivory soap. The trick is to use Ivory, which contains an unusually high amount of air. Since air contains water moisture, Ivory also has water hidden inside the bar of soap. The microwave will excite the water molecules and your kids will never look at the soap the same way again.

Toss a naked bar of Ivory soap onto a glass or ceramic plate and stick it into the microwave on HIGH for 2-3 minutes. Watch intently and remove when it reaches a “maximum”. Be careful when you touch it after taking it out of the microwave oven – it may still hold steam inside. You can still use the soap after this experiment!

Comments off

Survival Tips for Science Fair Projects

We’ve posted this before, but here’s a recap in case you missed it:

Survival Tips, Part 1

Survival Tips, Part 2

Survival Tips, Part 3

Happy Experimenting!

Comments off
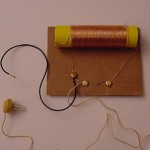
Crystal Radios

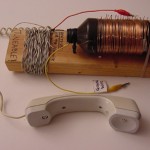
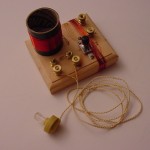
We’ve had more than a few emails asking WHEN our crystal radio project would be out… so I wanted to be sure to let you know that it’s ready right now!  We cover several different crystal radio designs, including tuning coils and variable capacitors, in this one project.  If you’ve ever wanted to make a radio that doesn’t require batteries, this is the perfect project for you.  Here are the latest images from the radios we cover in the kit:

Comments off

Underwater R.O.V. Robot

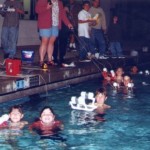
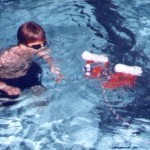
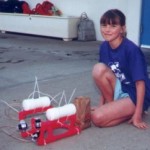
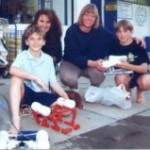
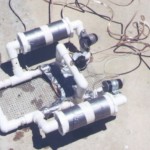
This is one of my favorite projects, as it really teaches the kids how to make switches that power a motor both forward and reverse as well as chassis design and waterproofing thrusters.  Kids that make this R.O.V. project are often surprised by how much of a role buoyancy plays out in their robot, but with a few tweaks here and there, their underwater submersible can be zooming around in no time!  I thought you’d like to see a few of the images we’ve had sent to us over the years we’ve taught this project:

Comments off

More on Borax Crystals

Okay, so after that last email we sent about substituting laundry whitener for sugar, we received a flurry of emails, asking for more specific directions!  Well, here they are…

Grow beautiful crystals using laundry soap! In an OLD saucepan (like one you only use for science experiments), add a few cups of water and enough borax so that you can’t dissolve any more borax into the water (you”ll see sediment particles on the bottom of the pan). Turn on the heat to medium and stir with an OLD spoon (again, from your science tools) and when the sediment disappears, add a bit more borax… and stir… and when that disappears, add a bit more borax… and stir… and when that disappears… you get the idea!

You’re creating a super saturated solution here. When you can’t dissolve any more borax to the solution, and a bit of water and turn off the heat. Let cool to 130 deg F and pour into awaiting glass pickle jar. Balance a pencil across the mouth of the jar and suspend either a length of string or a pipe cleaner twisted into interesting shapes (like a snowflake, or a dog, etc…) Leave for about 6 hours and then check back. Crystals will grow to full size overnight if you’ve set up your solution just right.

Keep your eye on it, though, because these crystals not only grow quickly, but once the crystals from the pipe cleaner touch the ones growing on the sizes of the jar, you won’t be able to extract your shape! (Unless, of course, you want to grow a geode…)

Comments (2)

Building a Mad Science Lab

Turning your kitchen table into a Mad Scientist Laboratory!

a17

Chemistry is an exciting subject for kids of any age, especially if you set up a natural discovery environment for them to safely explore in. Let’s find out how to do this with your own homeschool science learning environment.

At a university, one of the first things you will learn about in your chemistry class is the difference between physical and chemical changes. An example of a physical change happens when you change the shape of an object, like wadding up a piece of paper. If you light the paper wad on fire, you now have a chemical change. You are rearranging the atoms that used to be the molecules that made up the paper into other molecules, such as carbon monoxide, carbon dioxide, ash, and so forth.

How can you tell the difference between physical and chemical changes? There’s an easy way to tell if you have a chemical change: if something changes color, gives off light (like the light sticks used around Halloween), heat is absorbed (gets cold) or produces heat (gets warm). Some quick examples of physical changes include tearing cloth, rolling dough, stretching rubber bands, eating a banana, or blowing bubbles.

Let’s mix up chemicals that bubble, ooze, freeze, and change colors. Before we start, you’ll need to get these items together: a muffin cup baking tray, water, vinegar (acetic acid), baking soda (sodium bicarbonate), washing soda (sodium carbonate), rubbing alcohol, hydrogen peroxide, citric acid, ammonium chloride (don’t activate the cold pack, but instead cut open and empty the contents into a plastic bag and discard the water pouch inside), aluminum sulfate (“alum” in the spice section of the grocery store or drug store), a head of red cabbage and a clear liquid dish soap such as Ivory.

Cover your kitchen table with a plastic tablecloth (if you have small kids, put another tablecloth on the floor to catch the spills). Place your chemicals on the table. A set of muffin cups make for an excellent chemistry experiment lab. (Alternatively, you can use empty plastic ice cube trays.) You will mix in these cups. Leave enough space in the cups for your chemicals to mix and bubble up – don’t fill them all the way when you do your experiments!

Shopping List:

• Rubbing alcohol (largest bottle)
• Hydrogen peroxide (largest bottle)
• Baking soda (largest box you can find)
• Distilled white vinegar (largest size)
• Washing soda (near the laundry soap)
• Citric acid (optional, but nice to have)
• One head of red cabbage
• Clear ivory dish soap (small bottle)
• Alum (check the spice section)
• Single-use cold pack ( not the gel kind)
• Plastic zipper bags and old water bottles
• Muffin cup baking tray (12 cups or more)

Set out your liquid chemicals in easy-to-pour containers , such as water bottles (be sure to label them, as they all will look the same): alcohol, hydrogen peroxide, water, acetic acid, and dish soap (mixed with water). Set out small bowls (or zipper bags if you’re doing this with a crowd) of the powders with “scoopers” made of the tops of your water bottles. The small “scoopers” regulate the amounts you need for a muffin-sized reaction. Label the powders, as they all look the same.

Although these chemicals are not harmful to your skin, they can cause your skin to dry out and itch. Wear gloves (latex or similar) and eye protection (safety goggles), and if you’re not sure about an experiment or chemical, just don’t do it. (Skip the peroxide and cold pack if you have small kids.)

What about the red cabbage? Red cabbage juice has anthocyanin, which makes it an excellent indicator for these experiments. Anthocyanin is what gives leaves, stems, fruits, and flowers their colors. Did you know that certain flowers like hydrangeas turn blue in acidic soil and turn pink when transplanted to a basic soil? This next step of the experiment will help you understand why. You’ll need to get the anthocyanin out of the cabbage and into a more useful form, as a liquid “indicator”.

Prepare the indicator by coarsely chopping the head of red cabbage and boiling the pieces for five minutes on the stove in a pot full of water. Carefully strain out all the pieces (use a fine mesh strainer) and the reserved liquid is your indicator (it should be purple).

When you add this indicator to different substances, you will see a color range: hot pink, tangerine orange, sunshine yellow, emerald green, ocean blue, velvet purple, and everything in between. Test out the indicator by adding drops of cabbage juice to something acidic, such as lemon juice and see how different the color is when you add indicator to a base, like baking soda mixed with water.

Have your indicator in a bottle by itself. Old soy sauce bottles or other bottles with a built-in regulator that keeps the pouring to a drip is perfect. You can also use a bowl with a bulb syringe, but cross-contamination is a problem. Or not – depending if you want kids to see the effects of cross-contamination during their experiments. (The indicator bowl will continually turn different colors throughout the experiment.)

Your mission: To find the reactions that generate the most heat (exothermic), absorb the most heat (endothermic), and which are the most impressive in their reaction (the ohhhh-ahhhhh factor).

The Experiment: Start mixing it up! When I personally teach this class, let them have at all the chemicals at once (even the indicator), and of course, this leads to a chaotic mix of everything. When the chaos settles down, and they start asking good questions, I reveal a second batch of chemicals they can use. (I have two identical sets of chemicals, knowing that the first set will get used up very quickly.)

Tip for Testing Chemical Reactions: Periodically hold your hand under the muffin cups to test the temperature.

After the initial burst of enthusiasm , your science students will intrinsically start asking better questions. They will want to know why their green goo is creeping onto the floor while someone else just bubbled up hot pink, seemingly mixed from the same stuff. Give them the change to figure out a more systematic approach, and ask if they need help before you jump in to assist. Use the indicator both before and after you mix up chemicals, and you will be surprised and dazzled by the results!

Comments off